Posting to wordpress.com from TJ4
After you have signed up at WordPress.com and you have a brand new blog up and running, you will need to setup your blog profile in TJ.
Go to Tools/Blog Profile…, from there you will be presented with the Blog Profiles dialog. Click on Create New Blog Profile and follow the steps and screenshots below.
1 - On the first tab “Blog Tool”
Choose your Blog Tool : WordPress
Enter your blog user name :
In Blog API
Enter you blog host name : [username].wordpress.com
In the Page section enter: /xmlrpc.php
Leave the defaults for the rest

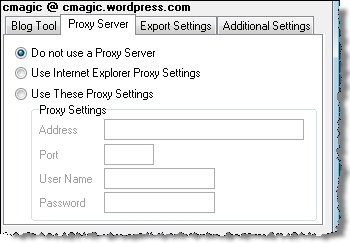
2 - On the second tab “Proxy Server”, you should normally leave the default (do not use a proxy server).
3 - On the third tab “Export Settings” select No formatting if you only wish to export text to your blog. in the case you also want to export TJ formattings and images make sure to select HTML formatting.

4 - On the fourth tab “Additional Settings” you have the ability to specify more options that depends on how you would like TJ to manage your blog postings. I like to be prompted for a post title.

Great ! Now that you have everything you’re ready for a test drive. Scribble some entry in TJ, add some images and calendar charms if you wish. Now while you are in your entry select all or part of it and go to Tools/Post to Blog, select the blog profile you just created.
If you have set the option to prompt for a post title, you will be prompted for it

If you have already setup categories on you wordpress.com blog then you will be prompted with a “Choose Category” dialog. Once you’ve made your choice of categories hit Post and the Posting Blog progress bar will normally progress…..

Normally the next step is the glorifying “Blog Posted” window.

Congratulations on you first post to wordpress.com using The Journal !
Note that this post has been completely created, edited formatted and posted from within The Journal (including screenshot images).